Getting Started
The Events Manager
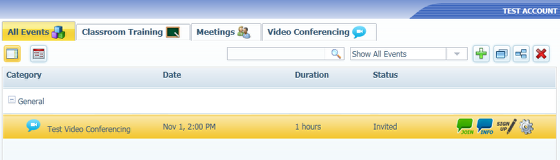
The Events Manager as depicted above, is the basis for OurTrainingRoom.com's video conferencing application.
Finding your event

Should you be presented with a lengthy list of events within the default view, you may elect to click on the Video Conferencing tab as depicted above, in order to display only those types of events. This will narrow down the list, allowing you to better find and interact with the video conference that you desire.
Event options
Each Event will present you with a number of options based on the type and status of any particular event.
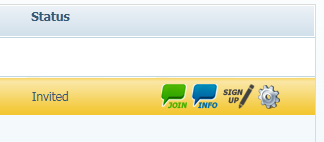
As depicted, you'll notice the current Status, which in this case is indicating that you've been invitied to join/attend this event. In addition, you have the ability Join a conference, get more Info pertaining to the event details, Sign Up for the Event should you wish to attend, and for those managers, edit the event using the gear icon.
Event information
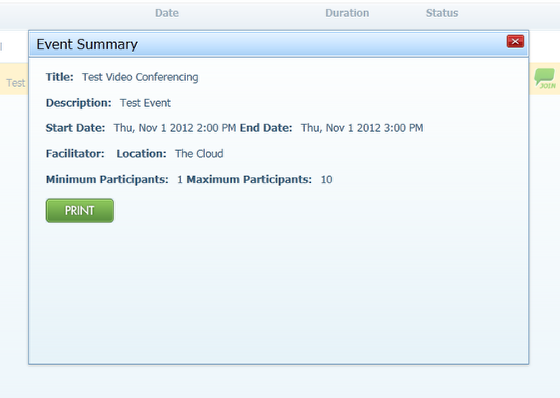
By clicking on the Info icon from the event options, you will be presented with a dialog similar to the above with the information that pertains to this event.
Signing up for an event
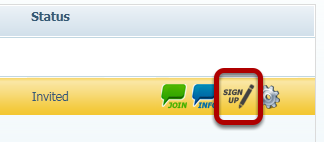
By clicking on the Sign Up icon from the event options, you will have elected to participate in this event.
Status confirmation
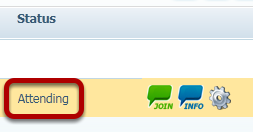
The Status column, will tell you as such, your current status for this event. In this case, by clicking on the Sign Up icon your status will be immediately changed to Attending.
Joining a conference

Once you've confirmed your attendance, you will be presented with the option of participating within this video conference by clicking on the Join icon.
If this icon is not present or is disabled, be sure that your status indicates that you're Attending the event and that the current time matches that of the conference. The Join icon will be enabled 15 minutes before the scheduled start time.
Pop-up Blocker
Having clicked on the Join icon to participated in this event, you may be presented with a Pop-up Blocker warning message similar to the above preventing you from opening this application. If this is the case, please disable the pop-up blocker for ourtrainingroom.com so that the video conference application can be loaded as intended.
Setting up your audio/video
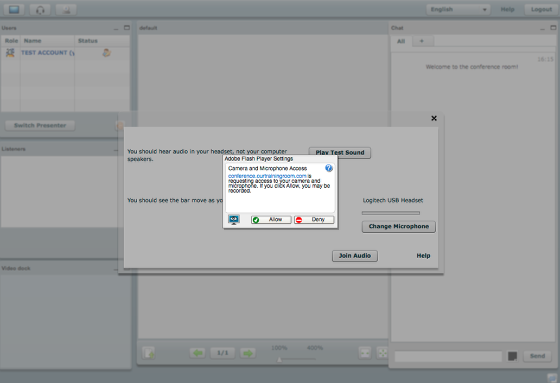
When lauching the video conferencing application, you will be presented with the option of sharing your audio and video devices for this conference. If you do not have a microphone or web camera, or do not intend to use either in this meeting, you may chose to Deny this permissions dialog. Otherwise click Allow, to grant this application access to your microphone and web camera.
Audio/Video options
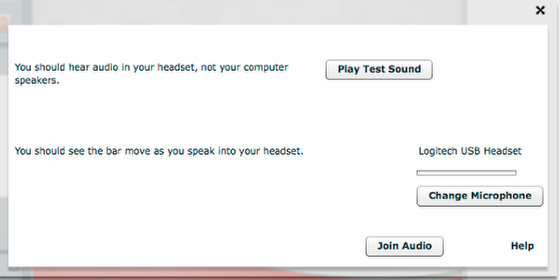
Should you have clicked Allow to grant access to your audio/video devices, you will be presented with the dialog above. You may test your speakers and volume level by clicking on Play Test Sound, you may change your microphone input, and finally if you wish to use your microphone to participate in this conference, you will have an opportunity to Join Audio.
The Application
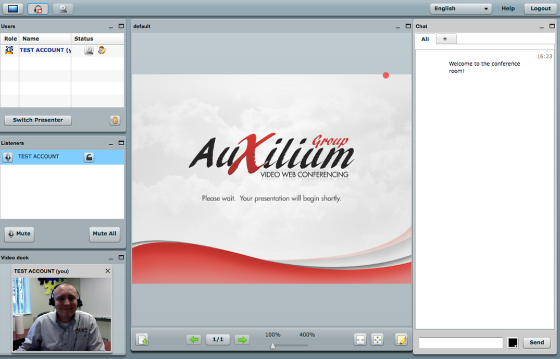
Having configured your audio/visual devices, you will be presented with the video conference application and its features.
Conference options
You will notice towards the top of your screen a number of conference options depending on your level of permissions. These include the ability to share your desktop, turn on/off your camera and microphone, switch languages and the option of logging out once you've concluded with this event.
Chat window
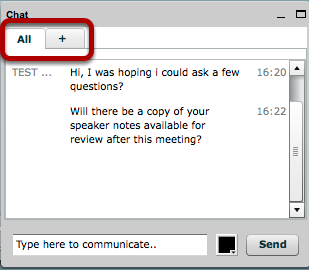
At any time, you can freely communicate via text with one or all of the participants within this event. This is helpful if you don't have a microphone, or to pose questions to the event facilitator without interuping the flow of the conference.
Towards the top, you may chose who you'd like to communicate with. By default, any messages typed will be shown to all members of the conference. If you'd like to communicate with an individual member of the conference, you may chose their name from the + tab.
Muting your microphone
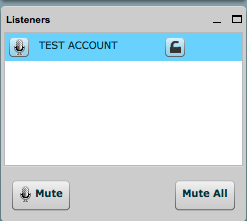
At any time, you may chose to Mute or Unmute your microphone by selecting your name from the list and clicking on the appropriate button towards the bottom.
Sharing your webcam
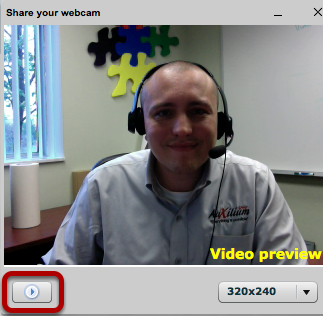
Should you have a web camera and want to publish yourself to the conference, you may click on the Share My Camera icon in the top menu bar as listed in step "Conference options".
This will present a dialog as depicted above, displaying the feed from your camera. When ready, click on the play button as highlighted in red to start sharing your camera with the other members of this conference.